If anyone has been following this blog, you probably noticed that I disappeared this summer. At first it wasn't deliberate, but life was busy. And then...it was deliberate.
One of the last posts I had up (not counting meal plans) was about the construction of our chicken coop. We finished the coop, the girls moved outside, and I was waiting on the weather to cooperate to get some good pictures of the finished work to share. I finally got those pictures, and was writing the post, when the unthinkable happened.
A stray dog got into our backyard.
For those that know me in real life, you've probably heard the story by now. For those that don't...I still get heavy hearted thinking about it. And that's what has kept me away from the blog. Because I'm still not entirely ready to write it all down.
But I'd like to get back to my meal planning posts because they really do help me. And I'd like to get back to my house update posts because they are fun.
So, my precious first flock is gone. We have plans to rebuild for next spring. We have plans to make the coop even more predator proof. Because methods that work against nocturnal predators proved useless against a determined neighborhood dog. But you may not see much about that until next spring.
But hopefully with this, I will get over that emotional hurdle the blog has represented, and I'll get back to the posts I enjoy.
Showing posts with label home. Show all posts
Showing posts with label home. Show all posts
Tuesday, September 6, 2016
Tuesday, May 3, 2016
Building a Chicken Coop in an HOA
This spring has been busier than we expected, so while we originally planned to custom build a coop we ultimately decided to order one. Planning for chickens while living in an HOA has been a little tricky due to size restrictions, but I also know that we're lucky our HOA allows chickens at all!
We ended up ordering this coop from CCOnly.com:

By our calculations, our 3 girls should be fine in here, especially since we plan to get a portable run to use when we are outside with them. One of the things I like about this coop is that if we do end up deciding they need a larger run, we can add on an extension relatively easily.
Of course, since we back up to open space and we have seen coyotes, foxes, and hawks frequently, we will be predator-proofing. Our plan for that involves digging down and out about a foot, laying 1/4" hardware cloth (to prevent anything from digging up into the run, like rats, voles, etc), then building up a foundation of CMU blocks with hardware cloth along the sides. Then the coop base will sit on the CMUs, with the hardware cloth from the foundation coming up and connecting to the hardware cloth on the sides of the run. The trench will be filled back in, and I'm considering laying pavers along at least one side so that there's a solid place to stand in the winter when the yard can get muddy from snow melt. We also got solar powered predator deterrents that use little red lights to mimic eyes. I'll write more about those once we install them and I know if I like them or not!
The coop also must be painted to match the house (one of our HOA rules). The body of the coop will be the same gray-blue as our house, and the trim plus the framing around the run will be off-white.
So, that's the chicken coop plan right now. It's been a constantly evolving plan, since we originally planned to custom design, then the coop we originally planned to purchase from CCOnly went out of stock while we waited to get HOA approval, and now we're waiting for a weekend with no snow on the ground so that we can get the process started! I'm looking forward to learning from the whole process, and giving our little chickens a nice home in our backyard.
Friday, January 1, 2016
2016 Home To-Do List Update
I didn't do an update of our giant to-do list when we hit our one year house anniversary in October, but with the new year I thought it was a good time to go over the list again.
Exterior

- reseal driveway
- repaint exterior -- planning this for next spring
Yard & Back Deck


remove old satellite dish to give access to electrical paneldoor mat by sliding door- repair/replace back deck steps
weed front yardplanters on back deck- get bird feeders
plan & plant veggie garden-- we had a decent veggie garden last summer, though I have some improvements in mind for this year- plant fruit trees
install compost bin- build chicken coop & run
Front Porch
new welcome matpotted plants on either side of entry
Entryway

- paint
- update light fixture
turn coat closet back into coat closet (it currently has wire shelves, but we would like to hang coats in there)figure out some shoe storage near door- get runner
get coat rack/hat stand for corner in stairs -- something that is functional, but also provides visual interest
Living Room

- fix drywall patches
- paint
- repair windows with broken sashes: living room left
- hang art
- get rug
Dining Room


fix drywall patchespatch triminstall beadboard wallpaper below chair railpaint beadboard wallpaper to match trimpaint upper part of walls- update light fixture
- get rug
new dining room chairs
Office

remove wallpaperpatch & paint trimpaint wallshang shelves- remove closet doors, turn closet into filing/bookshelf area?
Kitchen

new fridgecaulk around kitchen sinkpaint- update knobs
- update light fixtures
- update appliances to stainless steel when needed
- eventually replace countertops & sink; change out range for gas
Family Room


paintget rugnew larger couch, larger coffee table
Downstairs Bath

paint- update fixtures
Downstairs Hallway
- paint
- hang art
- get runner
- update thermostat?
Laundry Room

paintbuy washer & dryerupdate cabinet hardware- install folding shelf over washer & dryer
- get wall hanger for iron & ironing board
- figure out closet organization
Garage
fix garage door opener- build work bench
add storage for bikes, shovels, tools etc.
Stairs & Upstairs Hallway
- paint
- remove carpet on stairs, put in hardwood with runner
- refinish banister
Master Bedroom

patch holes in drywall- paint
Master Bath & Closet

replace lightbulb in closetget plumber in to install new wax ring on master toiletfix grout in master shower- paint
- new towel bars/hooks
fix linen closet doors -- they currently rub each other- update mirror & light fixtures
- update shower
Guest Room & Bath


- touch up enamel in upstairs guest bathroom sink
- repair windows with broken sashes: guest bathroom
patch trim, remove half finished framing below chair railpaint wall above chair rail- paint bathroom
get furniture for our holiday guests!- replace ceiling fan blades
new window treatments- update mirror & window treatments
- update vanity
- replace bathroom window with safety glass
Future Kid Room 1 (Currently Sean's Office)

- patch trim
- install beadboard wallpaper below chair rail
- paint beadboard wallpaper to match trim
- paint wall above chair rail
- replace ceiling fan blades
Future Kid Room 2 (Currently Cat/Sewing Room)

- patch trim
- install beadboard wallpaper below chair rail
- paint beadboard wallpaper to match trim
- paint wall above chair rail
- replace ceiling fan blades
Jack and Jill Bath
- replace knobs
- paint
- update mirror & light fixtures
Basement
determine & label ethernet cables in basement junctionreplace water diffuser in humidifier prior to turning on heat- new window well for basement window
- finish out basement
Tuesday, December 15, 2015
Family Room Decor
When going through my Chanukah decor pictures yesterday, I realized that I never posted pictures when I finished painting the family room/breakfast nook/kitchen! I painted it months ago, I can't believe we never actually photographed it! So for today's house update, here are some pictures of the family room.
I showed you this one with the nutcrackers and "Hanukkah" garland on the mantle yesterday:

Real life with a gray cat and off-white couches: we keep a blanket over her favorite spot at all times to make fur removal easier. Yep, that's a TARDIS blanket for the Whovian cat. The couches are slipcovered, so they are fairly simple to wash, but tossing the blanket in the laundry is even simpler and minimizes wear and tear on that one cushion.

Here's a better, less glare-y shot of the art behind the TV. Those are two vintage travel posters for Siena, Italy. Above the center speaker are a couple record covers, for My Fair Lady and Camelot.

The built in bookshelves have books, movies, art and other cool things. Here's our "superhero" shelf, with our collection of Marvel movies and our little Captain America and Baby Groot.

On the other side of the fireplace, I also have sections of shelf dedicated to Tolkein (both books and movies), Tamora Pierce books and David Eddings books. And a section of Arthurian legend/British pre-history since after doing my MFA "thesis" on Camelot I have a lot of Arthurian books!
And that's the family room! I'll take updated pictures of the kitchen and breakfast nook next and share those soon.
Monday, December 14, 2015
Chanukah Decorating (2015 Edition)
I had plans to post my Chanukah decor before the start of the holiday. But we were so busy with celebrations that I'm not actually getting it up until today, the last day. Oh well, better late than never!
This year, since we just finished the dining room and we were hosting a large group of friends for latkes and brisket, we did a lot of holiday decorating in the dining room.

The frames above the sideboard now have photos in them, but the package hadn't yet arrived from Shutterfly when I took these pictures.


We hung the felt menorah in the living room.

And did a little mantle decorating with nutcrackers and a glittery "Hanukkah" garland in the family room.


We also put some dreidel garland up the staircase, but with the snowy weather over the weekend I haven't had good light to take a picture. Hopefully the sun will cooperate so I can share that before December is over, but we will see.
This year, since we just finished the dining room and we were hosting a large group of friends for latkes and brisket, we did a lot of holiday decorating in the dining room.

The frames above the sideboard now have photos in them, but the package hadn't yet arrived from Shutterfly when I took these pictures.


You can never have too many dreidels!
And here's the dining table all set for 10! It was so fun to get out all of our wine glasses for a fancy party, it's not something we ever had room for in our old place!

We hung the felt menorah in the living room.

And did a little mantle decorating with nutcrackers and a glittery "Hanukkah" garland in the family room.


We also put some dreidel garland up the staircase, but with the snowy weather over the weekend I haven't had good light to take a picture. Hopefully the sun will cooperate so I can share that before December is over, but we will see.
Thursday, November 19, 2015
The Dining Room -- Nearly Done!
I'm almost done with the dining room! Yippee!
What started as a slow project simply because I was already in paint clothes turned into a massive day of painting Sunday. We had found a buffet and dining chairs we loved on super sconto (Italian for massive sale, it's a term I still use from my year abroad) at Restoration Hardware. We were told we would get a call around the 18th to schedule delivery. Well, they called on the 11th and wanted to deliver on the 17th! So my timeline got sped up a little bit, and we busted this room out. It helped a lot that Sean had the time to help paint, so he rolled the ceilings and walls while I did the trim and cut-ins.
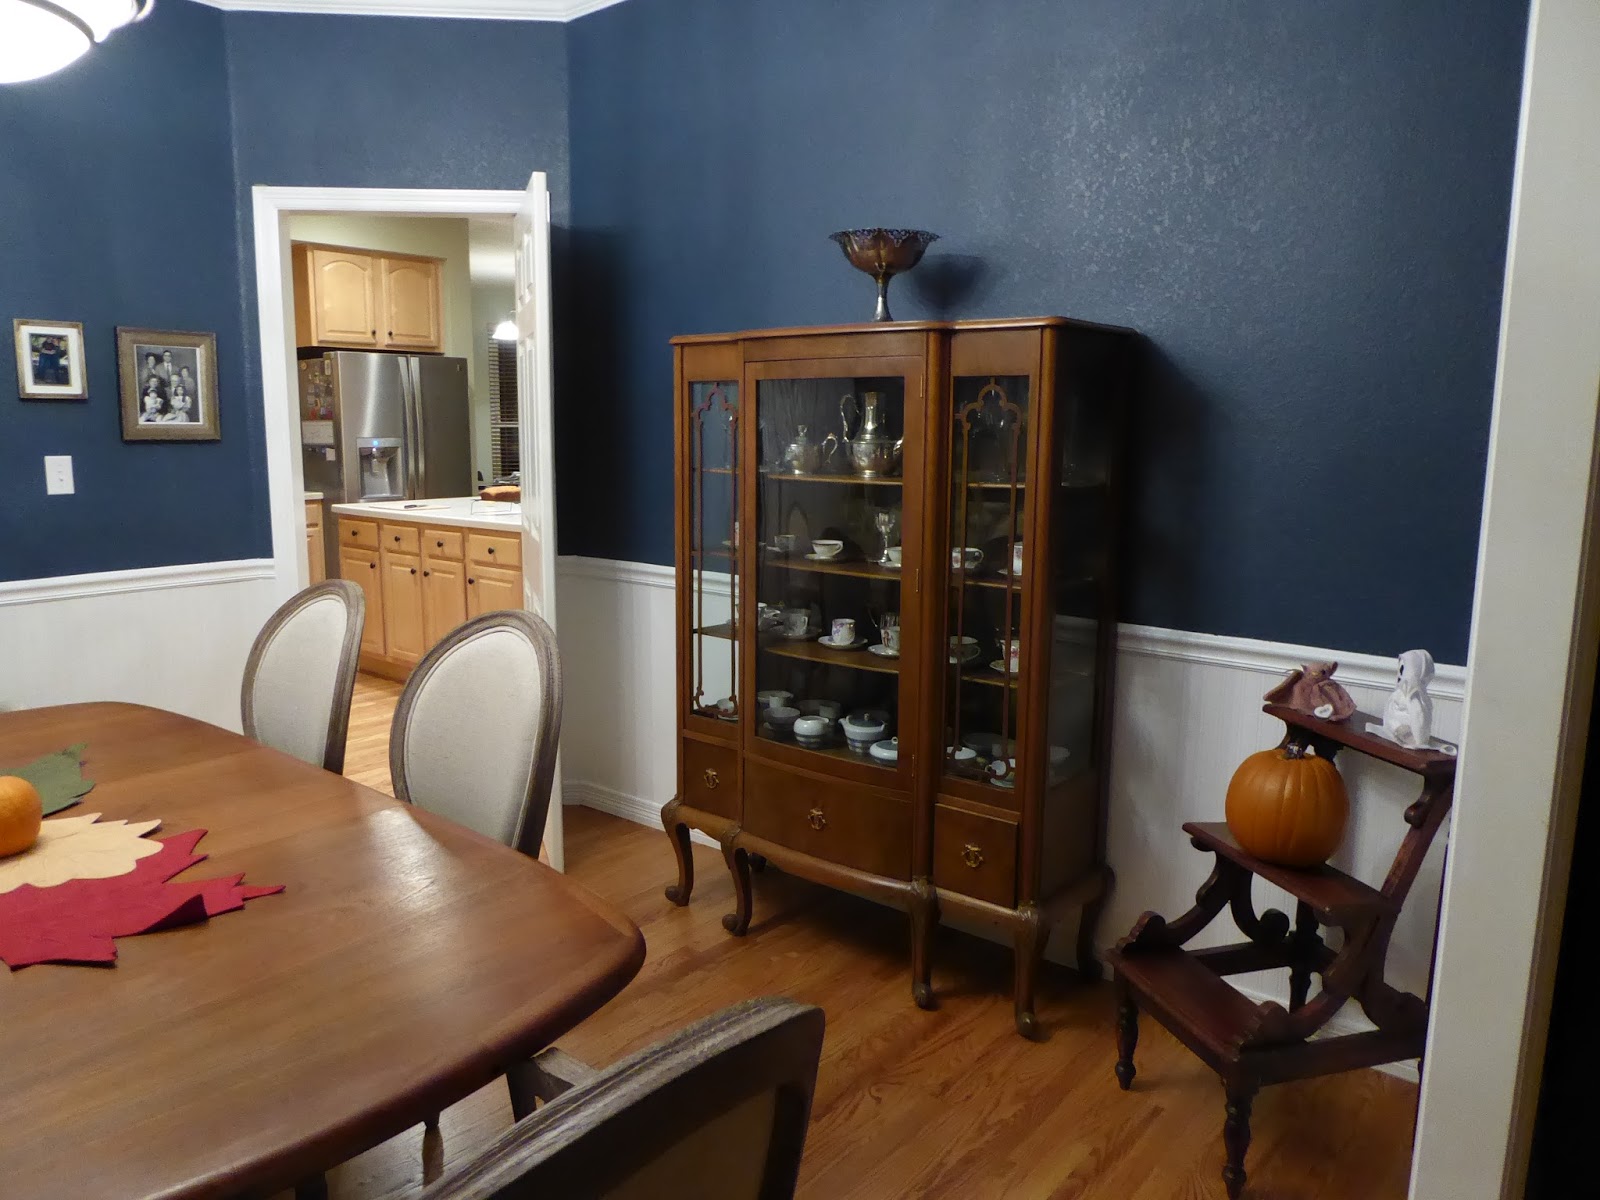
Here it is, the nearly finished dining room!


What do I still need to do?
I need to finish the painting around the window -- you can't see it here because the blinds are closed but I have to do the window surround in sections as I carefully pull back the blinds. The way that valance above it attached to the wall, neither it nor the blinds can easily come down without destroying some drywall. But I can be careful enough that it's not a huge problem, just slow going.
I also need to finish getting up that collage wall over the buffet. And put pictures in the frames! That's a picture from our wedding as the large center one, and the plan is to put black and white family photos radiating outwards. I have more frames, but they don't all have hanging hardware yet, so that's why it looks lopsided. I spaced out the arrangement on the table, started hanging, and had somehow grouped the frames without hardware. What can I say, it looked good!
So that's where we are with the dining room right now! I'm so excited to have to looking good, and to have a place to store everything that had been under the china cabinet. It makes me want to host a holiday gathering in here!
What started as a slow project simply because I was already in paint clothes turned into a massive day of painting Sunday. We had found a buffet and dining chairs we loved on super sconto (Italian for massive sale, it's a term I still use from my year abroad) at Restoration Hardware. We were told we would get a call around the 18th to schedule delivery. Well, they called on the 11th and wanted to deliver on the 17th! So my timeline got sped up a little bit, and we busted this room out. It helped a lot that Sean had the time to help paint, so he rolled the ceilings and walls while I did the trim and cut-ins.
Here it is, the nearly finished dining room!


What do I still need to do?
I need to finish the painting around the window -- you can't see it here because the blinds are closed but I have to do the window surround in sections as I carefully pull back the blinds. The way that valance above it attached to the wall, neither it nor the blinds can easily come down without destroying some drywall. But I can be careful enough that it's not a huge problem, just slow going.
I also need to finish getting up that collage wall over the buffet. And put pictures in the frames! That's a picture from our wedding as the large center one, and the plan is to put black and white family photos radiating outwards. I have more frames, but they don't all have hanging hardware yet, so that's why it looks lopsided. I spaced out the arrangement on the table, started hanging, and had somehow grouped the frames without hardware. What can I say, it looked good!
So that's where we are with the dining room right now! I'm so excited to have to looking good, and to have a place to store everything that had been under the china cabinet. It makes me want to host a holiday gathering in here!
Monday, November 9, 2015
Work on the Dining Room Begins
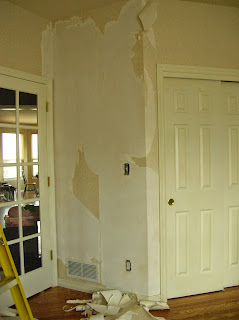
This past week I've been spending most of the day painting for a play. And since I'm already wearing paint clothes when I get home, I've started working on the dining room in bits and pieces:

I'm using beadboard wallpaper below the chair rail to simulate actual wainscoting. (A product that has a bit of a learning curve, but is fairly forgiving when it comes to fixing seams.) I'll then paint it in the same semi-gloss white that I've used for the trim throughout the house. Above the chair rail I'm planning on a deep navy like some of these inspiration images:


I'm using beadboard wallpaper below the chair rail to simulate actual wainscoting. (A product that has a bit of a learning curve, but is fairly forgiving when it comes to fixing seams.) I'll then paint it in the same semi-gloss white that I've used for the trim throughout the house. Above the chair rail I'm planning on a deep navy like some of these inspiration images:

dining room inspiration from HGTV

dining room inspiration from 58 Water Street
The dining room still has a ways to go before I'll call it "finished" -- I still need to find the perfect chairs and buffet, and after the painting is done I have plans for a wall of black and white family photos that I still need to collect from the parents. But it's great to finally be making some progress in here, slow though it may be!
Tuesday, October 27, 2015
Happy Anniversary, House!
As of last Friday, we've had our beautiful Colorado home for one year! It's been a great journey so far turning this house into our home, and I have a number of projects coming up in the next few months as well. To celebrate one year here, let's look at a few of the things we've accomplished to make the house ours:
One of the first projects I tackled here was my home office. I stripped the peeling wallpaper, primed the walls, and painted it a nice pale blue-gray. Then we put up the wall shelving that was above the desks back in CA.


One of the first projects I tackled here was my home office. I stripped the peeling wallpaper, primed the walls, and painted it a nice pale blue-gray. Then we put up the wall shelving that was above the desks back in CA.

before
after
I also updated the downstairs powder room with a beautiful blue (called San Francisco Bay) and a new mirror.

before

after
We installed a compost bin, hiding it behind some white lattice fencing and new plantings to make it HOA compliant.

And we took the guest room from a little girl's dream room into a sophisticated and relaxing place for friends and family to visit.

before
after
I'm looking forward to all the updates and projects I have planned for the next year! Here's to many more years, house!
Tuesday, August 11, 2015
August Garden Progress
After a fairly rainy July, it's been hot and dry so far this August. In addition to using the drip sprinklers, I've been going out with the hose in the evenings to make sure the veggies get enough water -- and a chance to cool down after the very hot days!
I wouldn't say this is the most productive garden I've had, since our balcony container gardens were always extremely productive per square foot. But I've had a steep learning curve with gardening in CO, plus far more inconsistent weather patterns! We have had some gorgeous tomatoes though, and I'm looking forward to seeing what else is a success in the garden this year.

Melons on the outside of the breakfast nook. We've had lots of little flowers, but I can't tell if any melons are actually growing yet.

Corn and pumpkins growing along the back fence. I tried beans too, but so far they've all fried in the hot afternoon sun.

Baby pumpkin!

One set of potted tomatoes and marigolds. The marigolds help attract pollinators and make it pretty!

I had a bunch of volunteer sunflowers in one corner of the yard.

Our row of marigolds, tomatoes, peppers and eggplants along the side fence.

Black tomatoes

The eggplants had a very slow start, but suddenly they're growing and some have these little purple flowers. Maybe I'll have some successful eggplants after all?

I don't know what this perennial bush is, but it attracts a lot of bees so I like it!

We had some volunteer plants in the sandbox, and it turns out they're tomatillos! Since my current plan is to turn the sandbox into a raised bed anyway, I'm letting them grow where they are. We'll see if they're any good.
That's where we are with our garden. If you garden, what's growing well for you? And if any readers have advice for gardening on the Front Range I'd love to hear it!
Subscribe to:
Posts (Atom)