After a fairly rainy July, it's been hot and dry so far this August. In addition to using the drip sprinklers, I've been going out with the hose in the evenings to make sure the veggies get enough water -- and a chance to cool down after the very hot days!
I wouldn't say this is the most productive garden I've had, since our balcony container gardens were always extremely productive per square foot. But I've had a steep learning curve with gardening in CO, plus far more inconsistent weather patterns! We have had some gorgeous tomatoes though, and I'm looking forward to seeing what else is a success in the garden this year.
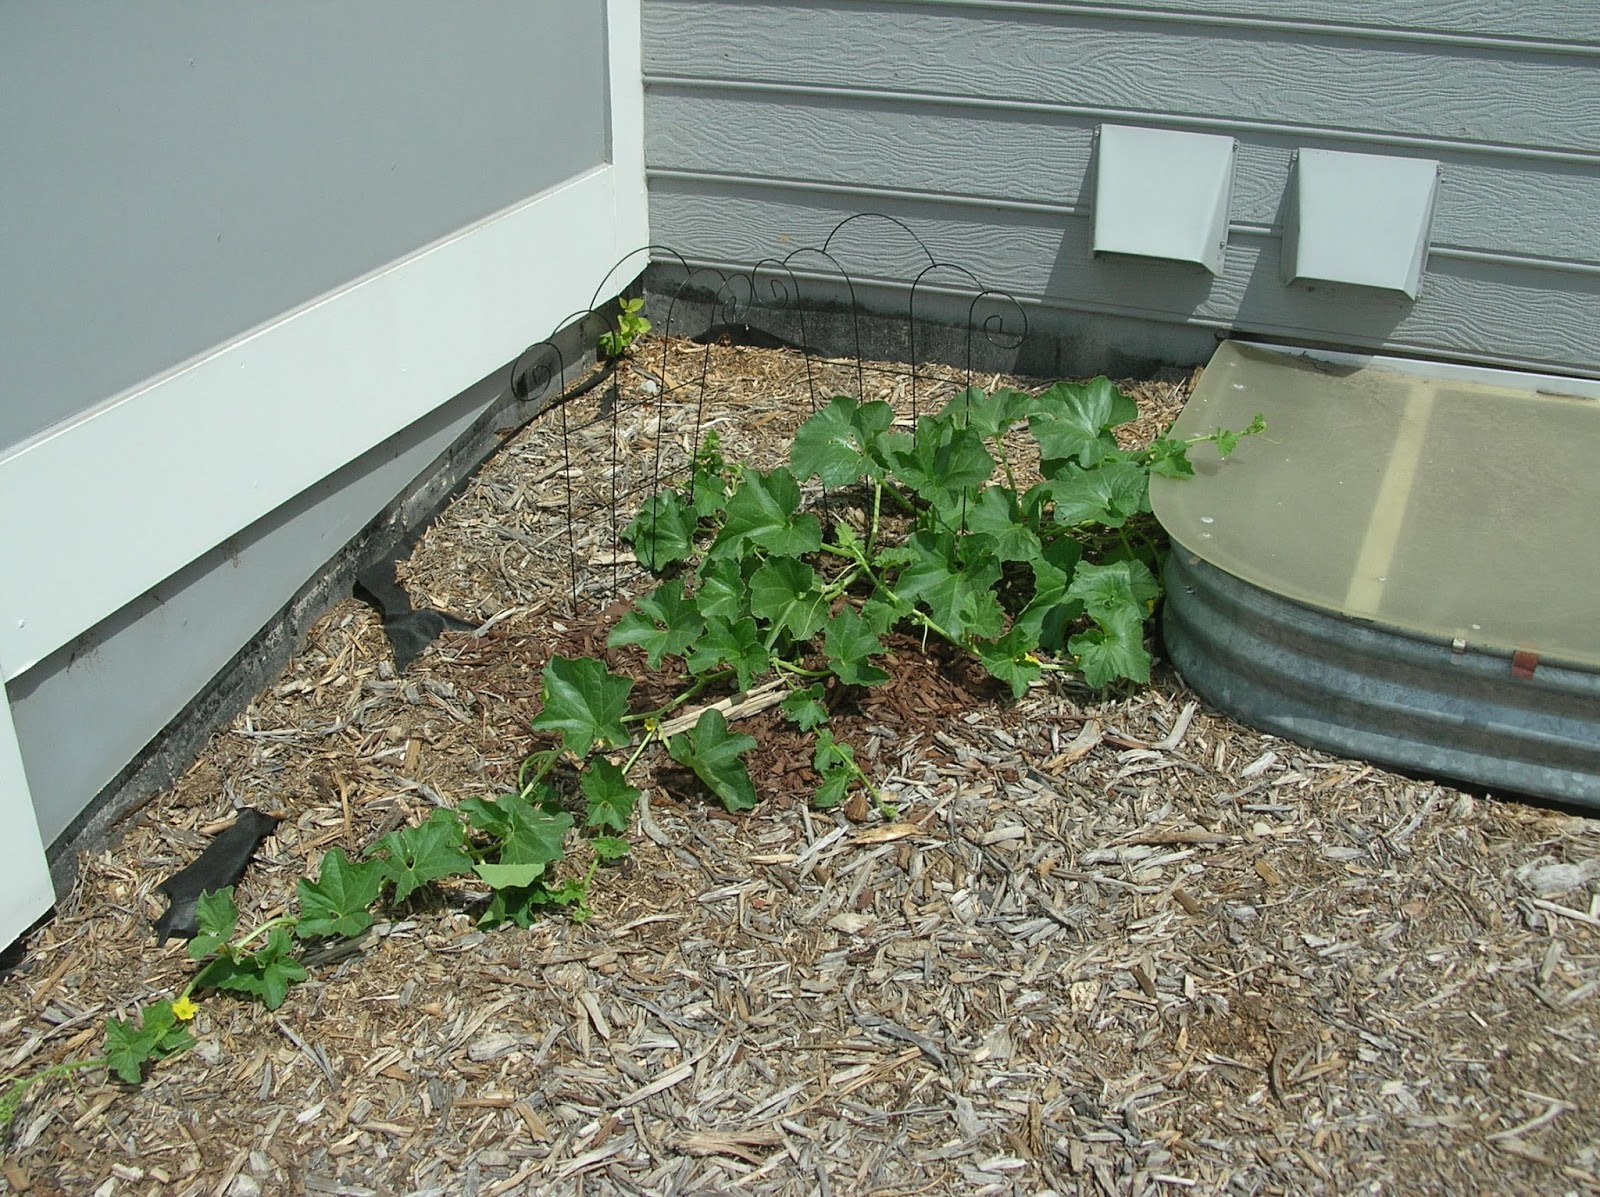
Melons on the outside of the breakfast nook. We've had lots of little flowers, but I can't tell if any melons are actually growing yet.
Corn and pumpkins growing along the back fence. I tried beans too, but so far they've all fried in the hot afternoon sun.
Baby pumpkin!
One set of potted tomatoes and marigolds. The marigolds help attract pollinators and make it pretty!
I had a bunch of volunteer sunflowers in one corner of the yard.
Our row of marigolds, tomatoes, peppers and eggplants along the side fence.
Black tomatoes
The eggplants had a very slow start, but suddenly they're growing and some have these little purple flowers. Maybe I'll have some successful eggplants after all?
I don't know what this perennial bush is, but it attracts a lot of bees so I like it!
We had some volunteer plants in the sandbox, and it turns out they're tomatillos! Since my current plan is to turn the sandbox into a raised bed anyway, I'm letting them grow where they are. We'll see if they're any good.
That's where we are with our garden. If you garden, what's growing well for you? And if any readers have advice for gardening on the Front Range I'd love to hear it!
Tuesday, August 11, 2015
Wednesday, July 29, 2015
Weekly Meal Plan 7.26.15
Between travel and house guests I've really fallen behind on my meal planning again! The summer craziness isn't over yet, but let's see if I can get back into some semblance of routine. Here's what we're eating/have eaten this week:
Sunday: grilled lamb chops and corn on the cob
Monday: Peach Margherita Pizza
Tuesday: dinner out
Wednesday: slow cooker chili using ground Tibetan yak from our co-op and fresh chili peppers from the farmer's market
Thursday: leftover chicken in a Thai simmer sauce with vegetables and rice
Friday: leftovers
Saturday: Parmesan Carrot Risotto
Rocket Ship Baby Gifts
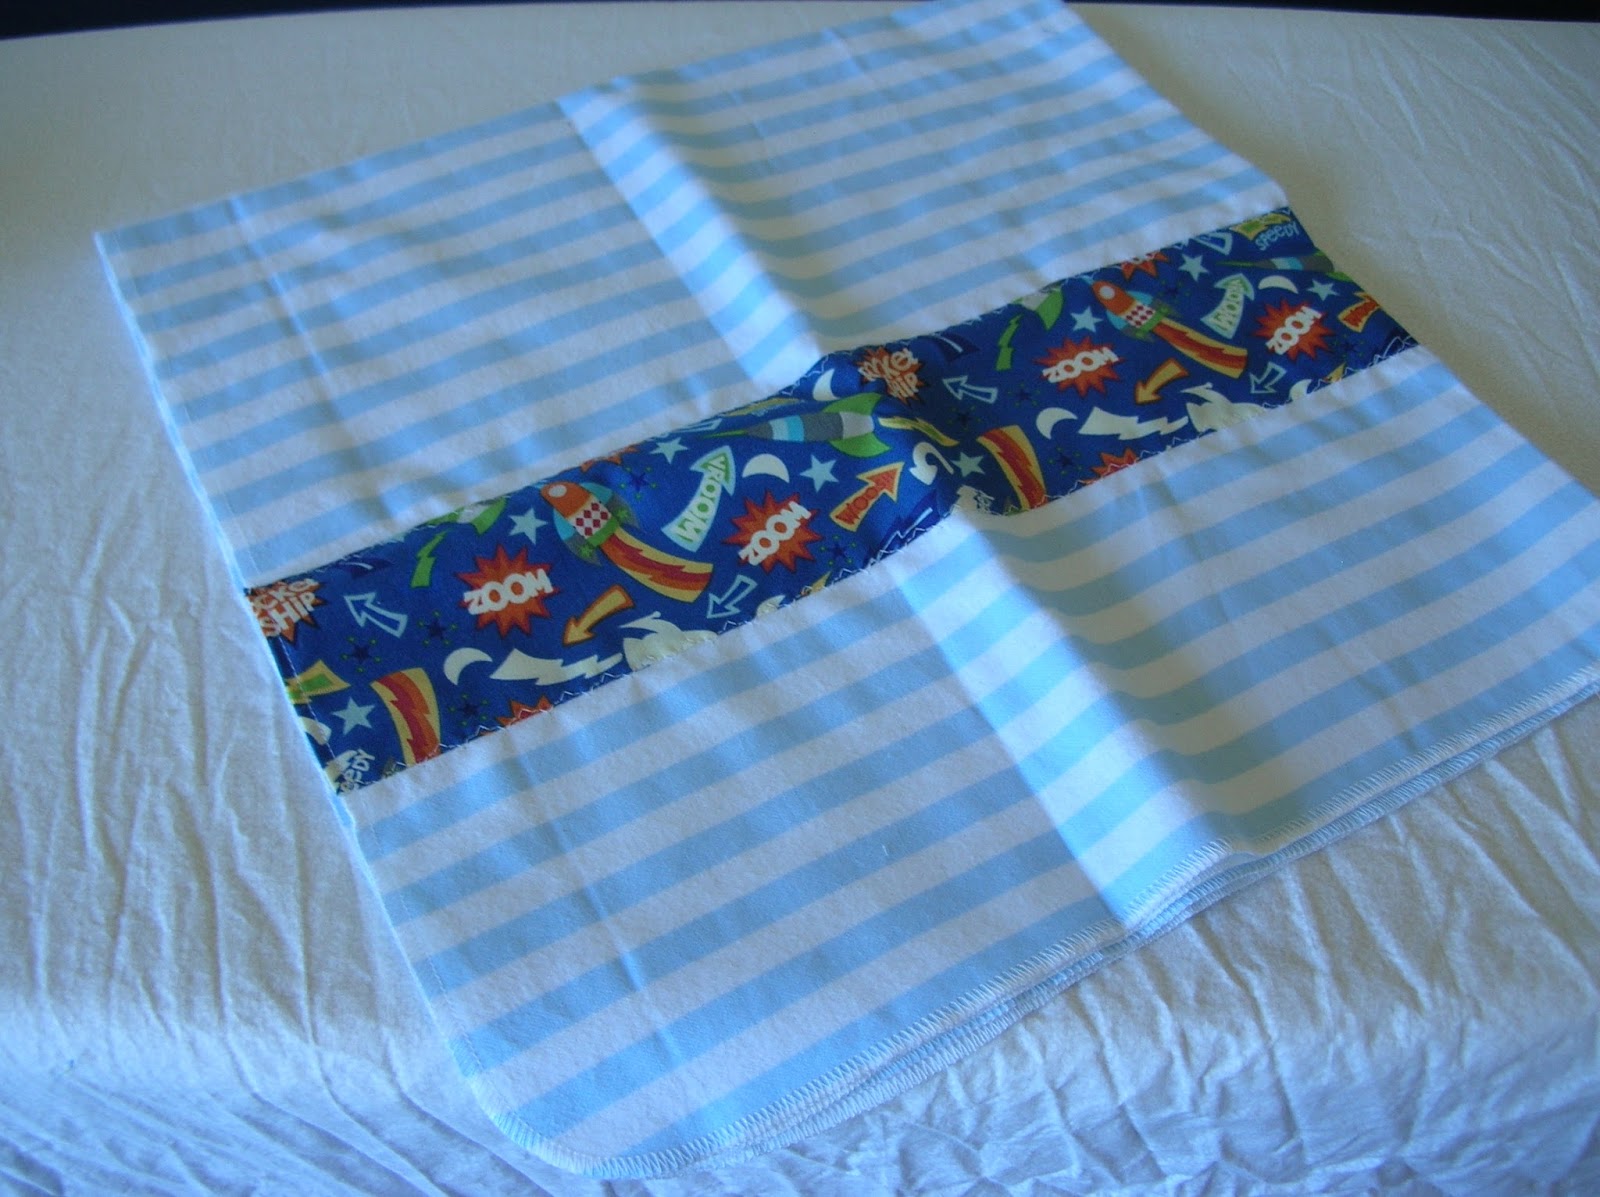
Last weekend I went to a friend's baby shower. Since both she and her husband are aerospace engineers, when I found this adorable rocket ship fabric I knew I had to make something special for their baby with it! Here are all of the baby items I made with it:
The trickiest was the bib, since I made that from scratch, while the other gifts were just embellished. I used the rocket ship fabric for the back, and some sturdy upcycled denim for the front -- with a rocket sunburst embellishment of course!
The onesies were fairly simple -- I just bought a pack of white onesies and used iron on paper to get the rocket ship and star on. Since my iron on paper is pretty old, I did have to do some stitching around the edges of each piece so that it will hold up. I like how it looks with the red stitching, but I'm glad I started with the iron on paper since that made it much easier than a million pins!
One of the easiest ways to personalize a baby present without going crazy is by adding a strip of fabric to a receiving blanket. I couldn't find plain white ones at Target, and wasn't willing to drive all over just for a simple receiving blanket, but I thought these light blue stripes would look nice with the space fabric. They also made it easy for me to make sure I was stitching in straight lines!
To add the strip of fabric, I measured a piece 3.5 inches wide, and 2 inches longer than the blanket. This gave me room to tuck the raw ends inside and have a clean look.
I pinned the strip, right side down, to the blanket following the lines that were already there. Then I sewed it on, and ironed it right side out. I then ironed the ends and the top hem in, so I could topstich those.
I went back over all of the edges with a decorative stitch to jazz it all up. In all, I'd say this blanket project only took about 20 minutes from start to finish.
And I still have some more rocket ship fabric left -- I wonder what the rest will become?
Linked up to:
Creative Jewish Mom
The trickiest was the bib, since I made that from scratch, while the other gifts were just embellished. I used the rocket ship fabric for the back, and some sturdy upcycled denim for the front -- with a rocket sunburst embellishment of course!
The onesies were fairly simple -- I just bought a pack of white onesies and used iron on paper to get the rocket ship and star on. Since my iron on paper is pretty old, I did have to do some stitching around the edges of each piece so that it will hold up. I like how it looks with the red stitching, but I'm glad I started with the iron on paper since that made it much easier than a million pins!
One of the easiest ways to personalize a baby present without going crazy is by adding a strip of fabric to a receiving blanket. I couldn't find plain white ones at Target, and wasn't willing to drive all over just for a simple receiving blanket, but I thought these light blue stripes would look nice with the space fabric. They also made it easy for me to make sure I was stitching in straight lines!
To add the strip of fabric, I measured a piece 3.5 inches wide, and 2 inches longer than the blanket. This gave me room to tuck the raw ends inside and have a clean look.
I pinned the strip, right side down, to the blanket following the lines that were already there. Then I sewed it on, and ironed it right side out. I then ironed the ends and the top hem in, so I could topstich those.
I went back over all of the edges with a decorative stitch to jazz it all up. In all, I'd say this blanket project only took about 20 minutes from start to finish.
And I still have some more rocket ship fabric left -- I wonder what the rest will become?
*****
Linked up to:
Creative Jewish Mom
Saturday, July 18, 2015
Guest Bedroom: A Work in Progress
We got the guest bedroom set up fairly quickly after moving in, since my parents were coming out mid-November to visit and help with house stuff. So, even though we didn't get to paint the walls at that point, we made it a pretty comfortable place for our overnight guests.
As a reminder, this is what the room looked like when we moved in:
Our most recent guests were one of my best friends and her husband, plus their puppy who was road tripping with them, so we actually moved everything except the bed out of the room before they visited. Pup is still in the teething stage, and since we have antiques in the guest room, we thought it better to just remove temptation!
So, with most of the furniture out of the room, it was the perfect time to paint it. It was a bit slow going, since I was also painting for a play and then I traveled to Prague for the Quadrennial. But we wanted to get this room done/livable before today, when my sister arrives for a visit. That means painting finished, blinds and (new) curtains back up, and furniture back in place. And we got everything done earlier this week, just in time for it to air out and not smell like fresh paint!
I'm also in the middle of sewing a quilt for this room (more on that later) so I spread the part-way done quilt over the mattress for some pictures to get a feel for the color.
Nothing like going through photos of a room to remind one to peel up the blue tape around the ceiling fan! You can also see Fleck lurking in this picture -- for some reason that has become one of her favorite napping spots lately.
And here is the bed actually made up and ready to sleep in:
We've started a silly little tradition of putting out differently themed groupings of Beanie Babies on the bed for each guest. My parents got "Canada" (Canadian goose, a moose, etc), my aunt got birds. For my sister: cats!
It's such a change to have a serene grey instead of the bright pink and blue. I will admit, my inner 6 year old was a little sad to paint over the pink, But grown-up me is very happy with the new look!
As a reminder, this is what the room looked like when we moved in:
Our most recent guests were one of my best friends and her husband, plus their puppy who was road tripping with them, so we actually moved everything except the bed out of the room before they visited. Pup is still in the teething stage, and since we have antiques in the guest room, we thought it better to just remove temptation!
So, with most of the furniture out of the room, it was the perfect time to paint it. It was a bit slow going, since I was also painting for a play and then I traveled to Prague for the Quadrennial. But we wanted to get this room done/livable before today, when my sister arrives for a visit. That means painting finished, blinds and (new) curtains back up, and furniture back in place. And we got everything done earlier this week, just in time for it to air out and not smell like fresh paint!
I'm also in the middle of sewing a quilt for this room (more on that later) so I spread the part-way done quilt over the mattress for some pictures to get a feel for the color.
Nothing like going through photos of a room to remind one to peel up the blue tape around the ceiling fan! You can also see Fleck lurking in this picture -- for some reason that has become one of her favorite napping spots lately.
And here is the bed actually made up and ready to sleep in:
We've started a silly little tradition of putting out differently themed groupings of Beanie Babies on the bed for each guest. My parents got "Canada" (Canadian goose, a moose, etc), my aunt got birds. For my sister: cats!
It's such a change to have a serene grey instead of the bright pink and blue. I will admit, my inner 6 year old was a little sad to paint over the pink, But grown-up me is very happy with the new look!
Friday, July 17, 2015
Design Finds of the Week #8
For the next few weeks, I'll be sharing different inspirational designs and projects that I came across during my trip to the Prague Quadrennial. They will be fairly diverse, as were all of the presenters at PQ, but they are all worth sharing!
Today I want to share an interesting new project called VIPA: The Viral Institute of Performance Architecture.
On their website you can see the transcript of the lecture they presented at the Prague Quadrennial here.
They describe performance architecture as "a continuum of performance and art." They have an active-body-centric view of architecture, rather than seeing the human user as a passive element.
As you can probably guess from my background, I love the confluence of architecture and performance. I'm very curious to see where this project will go in the future!
Today I want to share an interesting new project called VIPA: The Viral Institute of Performance Architecture.
On their website you can see the transcript of the lecture they presented at the Prague Quadrennial here.
They describe performance architecture as "a continuum of performance and art." They have an active-body-centric view of architecture, rather than seeing the human user as a passive element.
As you can probably guess from my background, I love the confluence of architecture and performance. I'm very curious to see where this project will go in the future!
Friday, July 10, 2015
Design Finds of the Week #7
I couldn't believe that it had been over a year since I last compiled some of the great design I come across into one of these posts! I like doing these weekly posts of good design, whether it's related to the house, the garden, or theater, so I'm going to work on getting back into the habit!
For the next few weeks, I'll be sharing different inspirational designs that I came across during my trip to the Prague Quadrennial. They will be fairly diverse, as were all of the presenters at PQ, but they are all worth sharing!
The first website/project I want to share is ecoscenography.com
Tanja Beer is a designer and PhD student focusing on sustainability in theatrical design. I talked with her a bit the day after I heard her speak, and her excitement for her field is infectious! Sustainability and conservation are huge passions of mine, and while I was studying architecture it was one of the main conversation topics of the industry, but the American theatre industry really just pays lip-service to the green movement. While Tanja told me that she doesn't do much mainstream theatre anymore, I do think that a lot of the things she is bringing attention to can be translated back into a mainstream environment, albeit perhaps with a bit more push-back from producers, theatre managers, and even directors. But I do believe that if designers make sustainability a priority, we can make a difference!
So check out her blog and projects, especially "This is Not Rubbish," the piece she spoke on at the Quadrennial.
For the next few weeks, I'll be sharing different inspirational designs that I came across during my trip to the Prague Quadrennial. They will be fairly diverse, as were all of the presenters at PQ, but they are all worth sharing!
The first website/project I want to share is ecoscenography.com
Tanja Beer is a designer and PhD student focusing on sustainability in theatrical design. I talked with her a bit the day after I heard her speak, and her excitement for her field is infectious! Sustainability and conservation are huge passions of mine, and while I was studying architecture it was one of the main conversation topics of the industry, but the American theatre industry really just pays lip-service to the green movement. While Tanja told me that she doesn't do much mainstream theatre anymore, I do think that a lot of the things she is bringing attention to can be translated back into a mainstream environment, albeit perhaps with a bit more push-back from producers, theatre managers, and even directors. But I do believe that if designers make sustainability a priority, we can make a difference!
So check out her blog and projects, especially "This is Not Rubbish," the piece she spoke on at the Quadrennial.
Thursday, June 11, 2015
An HOA Compliant Compost Bin
You might remember that at our condo, I made a small vermicompost bucket for the balcony. While we didn't have enough space there to take care of all of our compostable waste, those worms definitely made a good dent in our garbage and they gave us a decent amount of great worm castings in return.
I wanted some taller, flowering perennials as well as some lower green. This area is in shade all day during the winter, and most of the day during the summer, so the plants couldn't require more than a couple hours of direct sunlight. At our local nursery we found one climbing hydrangea, two Camelot foxgloves, and a couple varieties of hosta. I filled in the front with some periwinkle ground cover.
A view that only people on our property will ever see: the actual compost bin. That window well isn't actually big enough to be a proper egress, so we weren't worried about putting the bin a couple feet away from it.
In our HOA, compost bins are required to be approved. The idea is that they can be unsightly or smelly, but if you're doing it right they really shouldn't be! But, because so much of our yard is visible from the road or open space (great views of the mountains for us, great views into our yard for everyone else) we decided to play by the book and submit a plan for a compost bin.
The location that seemed the best for us, and our neighbors, unfortunately was also the most visible from the road. My solution: hid the bin with fencing, and then plant some shade perennials in front. Since this area was just mulch and weeds before, I knew that they wouldn't say "no" to something that would actually make the area MORE attractive from the street.
And I was right! The Architectural Committee approved my plans, so then Sean and I just had to wait for a non-rainy weekend to actually get out there and install the bin, fencing and perennials. We did just that this past weekend.
I wanted some taller, flowering perennials as well as some lower green. This area is in shade all day during the winter, and most of the day during the summer, so the plants couldn't require more than a couple hours of direct sunlight. At our local nursery we found one climbing hydrangea, two Camelot foxgloves, and a couple varieties of hosta. I filled in the front with some periwinkle ground cover.
A view that only people on our property will ever see: the actual compost bin. That window well isn't actually big enough to be a proper egress, so we weren't worried about putting the bin a couple feet away from it.
Pretty foxgloves helping to hide the compost!
We're definitely looking forward to being able to use this compost bin to reduce our waste, and in future years we will reduce the amount of money we need to spend on amending the soil. It's a win-win!
Linked up to:
Waste Not Want Not Wednesday
****
Linked up to:
Waste Not Want Not Wednesday
Labels:
conservation,
design,
DIY,
garden,
home,
vermicompost,
wastenot,
zero waste
Subscribe to:
Posts (Atom)