Tuesday, December 31, 2013

2013 Year in Review

2013...what a year!

This was my first year blogging, and I can definitely say I've learned a lot from the experience! While I haven't been the most consistent blogger, I do it because I enjoy it. Sure, I want to share my projects and experiences, but what it really comes down to is that I want to write. This is a fun way for me to write about the things I love: design, home projects and crafts, cooking experiments, and my garden.

Beyond the blogging experience, 2013 has been a great year. Sean and I celebrated our first anniversary, and we are both so close to finishing our graduate degrees. We saw my sister graduate from UCSD and start her own graduate program. We celebrated engagements and weddings with friends; new babies in the family; kids' birthdays. We made progress on our condo, bringing it more and more in line with our design vision, and less of a hodge podge of young college student furniture. I can't wait to see what 2014 holds in store!

Back to the blog world, here are my five top viewed posts from 2013:

Living Design: Packed Lunches for Adults

Living Design: Packed Lunches for Adults Round 2

Living Design: We Have Compost! Worm Update

slow cooker freezer meals

Living Design: And Then We Made Applesauce

Enjoy this recap! Here's to much more blogging fun in the new year!

2013 Reading List

I've been keeping track of the books and plays I've read this past year. Only those that I read all the way through made this list, so anything skimmed or unfinished isn't here.
Now that it's almost 2014, here's what I read in 2013:

Non-fiction
America's Garden by Michelle Obama
Zero Waste Home by Bea Johnson
Cooking Green: Reducing your Carbon Footprint in the Kitchen by Kate Heyhoe
Organic Housekeeping by Ellen Sandbeck
The Urban Homestead by Kelly Coyne and Erik Knutzen

Fiction
Notorious Nineteen by Janet Evanovich
The Serpent's Tale by Arianna Franklin

Plays
Peter Pan by J. M. Barrie
The Grapes of Wrath by Frank Galati, adapted from the novel by John Steinbeck
The School for Wives by Moliere (trans. Richard Wilbur)

Galileo by Bertolt Brecht
Sonia Flew by Melinda Lopez
The Unmentionables by Bruce Norris
Oresteia by Aeschylus
The Karl Marx Play by Rochelle Owens
Marat/Sade by Peter Weiss

Hoping to have an even longer list in 2014! I miss getting to read fiction just for fun, so hopefully that is something I'll be able to do once again after I finish grad school. But even all the plays I've read for work and school make up a list that isn't too shabby!

Happy new year, everyone!

Monday, December 30, 2013

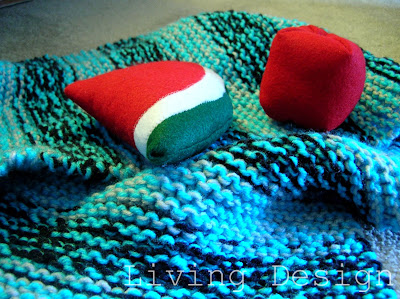
Felt Fruit - Handmade Holiday Gifts

Sean's family has quite a few kids, and we always like to get each kid a small gift for Christmas. This year, in keeping with my goal of handmade gifts, I sewed a bunch of felt fruit for the two toddlers.

Living Design - Felt Fruit

I made up bananas, lemons, apples and watermelon slices (one for each kid). I also made a carry sack, which served as both a gift bag and as a place to put away their play food.

I used a pattern from McCall's (this one) so I can't take credit for the fruit design. I will say that, while the watermelon and banana were fairly simple, the lemon and apple didn't turn out quite how I hoped. The pattern talked about adding floral wire stems though, something I didn't want to do for toddlers, so maybe that's part of the problem. Oh well, I still think it was a success, and I do look forward to making more for the next little one in the family!

****

Linked up to:

Saturday, December 28, 2013

TARDIS Scarf - Handmade Holiday Gifts

I already shared the simple Sharks scarf that I made for Sean's sister Sarah. Today I want to show you the Doctor Who TARDIS scarf that I made for his sister Amber.

I wanted to do a classy tone-on-tone TARDIS pattern. I didn't find anything that was what I wanted online, so I used graph paper to figure out the pattern myself. Then I did a sample in some scrap yarn to make sure my pattern worked the way I wanted it to...

And then I finally started the actual scarf in some lovely blue yarn! I went back over the pattern after it was blocked and embroidered the outline and details in silver - just a bit of pop to make the design stand out.

Living Design TARDIS scarf knit pattern

Unfortunately, as this was my first try at blocking a scarf, it didn't turn out perfectly. So I took the scarf back after we opened gifts so that I can finish it up the way I want it to look! (Amber didn't mind, she knows I can be a perfectionist about my creations...plus she go so much other Doctor Who stuff that she won't miss the scarf for an extra week or so of fixing it up!)

If you want to make this great TARDIS scarf for yourself or another Whovian, here is the pattern I developed:

Cast on 35 stitches
Knit one row, purl one row; continue alternating knit and purl rows until you have the base you want (I did 10 rows)
K5, P25, K5
P5, K25, P5

{K7, P3, K7, P1, K7, P3, K7
P7, K3, P7, K1, P7, K3, P7
*K7, P3, K1, P5, K1, P1, K1, P5, K1, P3, K7
P7, K3, P1, K5, P1, K1, P1, K5, P1, K3, P7* repeat this set of two rows 2 more times}

go back to the beginning of the {__} and do the whole section three more times

K7, P3, K7, P1, K7, P3, K7
P7, K3, P7, K1, P7, K3, P7

K7, P21, K7
P7, K21, P7
K9, P17, K9

P10, K15, P10
K10, P15, K10

P16, K3, P16
K16, P3, K16
P16, K3, P16
K16, P3, K16

Purl one row
Knit one row

continue alternating knit and purl rows until the scarf is almost the length you want, then repeat the TARDIS directions in reverse

Does that make sense? This is the first pattern I've ever created so please let me know if anything about these directions is confusing!

****

Linked up to:

Thursday, December 26, 2013

Sharks Scarf - Handmade Holiday Gifts

I hope everyone has had a wonderful holiday! Now that all the gifts have been given, I want to share some of the homemade gifts I gave this year.

First, an awesome San Jose Sharks scarf I made for Sean's sister Sarah. Sean was kind enough to model it for me before Christmas!


This was inspired by the "team colors" yarn I saw at Joanne Fabrics. Sadly, the Sharks colors of teal, black and white were not one of the pre-made yarn options. Instead, I picked up a skein of teal and some skeins of black & grey, and knitted them together to make a multi-colored, extra thick scarf perfect for those freezing ice rinks.


Since I was knitting with two strands of yarn at once, I kept the pattern simple and just did the whole scarf in garter stitch (that means just knit-knit-knit, nothing fancy). Then I added some fun tassels at the ends. I had just enough teal -- I started to run out as I did the tassels! So the tassels alternate grey/black with teal, or just grey/black.

This was a fun, simple project. My favorite kind of project for de-stressing after a busy day!


****

Linked up to:

Wednesday, November 27, 2013

That's a Whole Lot 'o Latkes!

Happy Chanukah!

Chanukah

As you've probably heard, this year Thanksgiving falls on the first day of Chanukah. I won't go into a detailed explanation of the Hebrew calendar and why Chanukah is so early this year...if you're interested, here is some great info on how the dates of Chanukah and Thanksgiving have intersected in the past, and when they will again (link).


Chanukah

Of course, what this means for me is two days of latkes! We have a somewhat complicated rotation for our Thanksgivings, since Sean grew up always celebrating with each side of his family separately. This year we have Thursday with my family to do "Thanksgivukkah" and Friday with Sean's extended family on his mom's side. Sean has seven cousins on his mom's side, all with spouses or dates, and lots of kids. It's the giant raucous gathering I never had as a kid! This year there will be about 25 people at our Friday feast, and I'm making the latkes!

I probably won't get the chance to share any pictures of latkes until after the Thanksgiving weekend...oh, who am I kidding. I won't get the chance to share them until winter break! But until then, I wanted to share what our current Thanksgiva-Christma-Chanukah decorations look like. Dreidels, menorahs, Nutcrackers, ornaments, pumpkins and squash. What more could you want?

Chanukah
Chanukah

Wishing everyone a wonderful Thanksgiving, and a festive Chanukah!

Tuesday, November 26, 2013

Dried Persimmons

Dehydrating fruit is a great, easy way to preserve a bounty without canning. As I mentioned in my previous post about persimmons, they are not acidic enough to be safely canned in a boiling water bath. Because we had already filled our own freezer and my parents' with jars of persimmon butter as well as chopped persimmons, drying was necessary!

The method is so simple it hardly qualifies as a true "recipe." All I did was slice them  into fairly even chips, about 1/4" thick. I placed them on the dehydrator racks, making sure not to overlap. I then ran the dehydrator for about 8 hours. My dehydrator only has an on/off switch, no temperature control, so I can't say what temp to set a more complex machine to.

Living Design: Dried Persimmons

In step-by-step directions:
1. Slice persimmons into 1/4" thick rounds
2. Place on dehydrator racks, with no overlap
3. Run dehydrator for 8 hours, or until done
4. Store in sealed container

Dried persimmons make a great snack! Dried fruit also lasts fairly long in a sealed bag in the pantry, so I'm sure we will be enjoying these dried persimmons for much of the winter.

Do you dehydrate fruit? What are some of your favorites? I'm new to dehydrating, but since it's so simple I'd love to do more of it and I always love new ideas!

****

Thursday, November 21, 2013

Knee Deep in Persimmons

Last Saturday we went out with Village Harvest again, this time to pick persimmons. I don't have any pictures of the actual harvest to share with you, but I do have pictures of all the persimmons we came home with!

Living Design: Persimmons

Over 1000lbs of persimmons were donated to local food banks, and about 200lbs of damaged or over ripe fruit were available for volunteers to take home. Sean and I ended up with 3 bags, which weigh about 47lbs. Man, that's a lot of persimmons.

Unfortunately for us, these persimmons are not the sweet Fuyu variety, but the highly astringent Hachiya variety. This means they can't be eaten raw unless they are super ripe, something unlikely to happen before they go moldy since so many are damaged. So, like I have after other harvests, I turned to Pinterest to find recipes!

We started with persimmon butter. Similar in texture to apple butter, it can be spread on toast. I used this recipe from Green Basket. The author does call for Fuyus, but after doing some research I figured out that Hachiyas would work fine if I increased the sugar a bit. Unfortunately, while the author says she canned her persimmon butter, the National Center for Home Food Preservation does not recommend using a boiling water bath for canning persimmons as they are a low-acid fruit. (A term Sean would like to go on record as taking issue with, as neutral or base would be more correct, depending on where the fruit actually falls on the PH scale. I love when he's a science geek in the kitchen!) Instead of canning, we decided to freeze the persimmon butter. Luckily, my parents had recently made some room in their large freezer, so in went some jars of persimmon butter!

We also made a batch of persimmon chutney using this recipe. The chutney was very easy, and made a small enough batch that, while the vinegar should make it safe to can in a boiling water bath, we decided to just refrigerate and freeze.

One of the best ways to use up all these persimmons, without needing to freeze a ton of jars, is to dry them. My mom recently picked up a cheap food dehydrator at a thrift store, and this thing has been working overtime since she brought it home! I'm so glad she let us borrow it. Here it is full of persimmons:

Living Design: Dehydrated Persimmons

We also just tossed a bunch of whole persimmons in both our own freezer and my parents'. I just chopped off the tops, trimmed any bad spots, and filled gallon sized freezer bags. This gives us more time to spread out the cooking, drying, baking...whatever we want to do with them.

Last but not least, I made a batch of Chocolate Persimmon Muffins. This recipe was amazing! I had to change it a little since neither of us wanted to run to the store again, so I used white chocolate powder rather than regular; I also used whole wheat flour rather than buckwheat. I can't wait to make these again using some of the persimmons we tossed in the freezer!

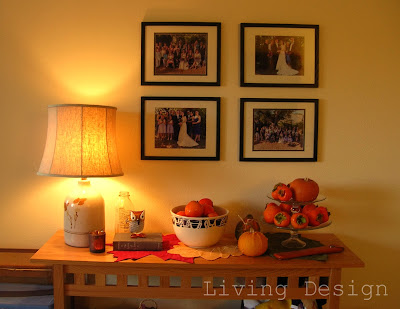
Persimmons also make for good fall decor, as long as they are intact enough to last a few days:


Living Design: Persimmons

Living Design: Fall Decor

If you have any favorite recipes for Hachiya persimmons, please share in the comments! You can see from the picture just how many we still need to deal with...and then there are the 4 gallon bags in the freezers!

Tuesday, November 19, 2013

Handmade Holiday Gifts: A Preview

Back in July, Sean and I decided we wanted to strive for a minimal waste holiday. Fewer gifts that come with excessive packaging; more handmade gifts; using recyclable or reusable materials for wrapping. Well, now that it's only a week and a half until Chanukah, it's looking like fewer handmade gifts than we hoped. But, we have been able to make some good choices regarding packaging so I'm still pleased with how we're reducing our waste this holiday season.

Just in case any gift recipients read my blog, I won't post any pictures of full gifts until after they are given (whether it's given at Chanukah or Christmas). But, here's a preview of what I've been making:
 
Living Design: Handmade Holiday Gifts

I'm looking forward to sharing all of my handmade holiday gifts after Christmas!

****

Linked up to:

Thursday, November 7, 2013

Slow Cooker Meals: Recipe Review

Whew! I've made it through another round of tech rehearsals and opening night! I love working in theater, but it sure can be exhausting.

Because of all the late nights that come from opening a show, I made up a few slow cooker meals for the freezer back in September. Since I'm fairly new to using the slow cooker in general, and especially new to freezing and then cooking, I wanted to pop back in and share what we thought of each recipe.

To recap, I made the following three meals:
Apricot Chicken from A Year of Slow Cooking
Thai Peanut Chicken from Practical Stewardship
Chicken with Kumquat Chutney (based on the Barbeque Chicken at Practical Stewardship)

The Chicken with Kumquat Chutney was the first meal we tried. It was simple and tasty, though I would use more chicken or less sauce next time. The only drawback to this was that it only covers the main dish; Sean whipped up some salad to go with it, which worked well. But it does mean that, when planning to pull this meal out of the freezer, a veggie side dish also needs to be planned.

The Thai Peanut Chicken was the next meal that got pulled from the freezer. This is a great meal for a busy day since you can do chicken and veggies at once. It's also an awesome recipe for using up those random veggie scraps I sometimes toss in the freezer. I will say, as someone who grew up in the SF Bay Area with all the culinary diversity around, this was blander than any Thai food I've had at a restaurant. I may tinker with the sauce a bit to give it more spice or depth, but overall I think this is a pretty successful recipe.

The Apricot Chicken was actually my least favorite recipe. It was just far too sweet for me. Growing up, my mom made some Apricot Ginger Chicken Wings...maybe tinker with the recipe and add in some ginger to cut the sweetness? Reduce the amount of jam? It wasn't bad, but I wouldn't make it following the original recipe again.

Even though I want to tinker with these recipes, I'd still say my experiment was a success! Despite long tech days, we got to eat some real meals without all the additives of store-bought freezer food. I think I'll keep experimenting with slow cooker freezer meals...maybe try to do one a week? We'll see, but I know I'm definitely happy to have the time to get back into my blogging groove!

Monday, October 14, 2013

A Month of Small Fixes: Organized Recipes

Last summer, Kate at Centsational Girl had a post about taking her huge collection of magazines and pasting the dog eared pages into bound sketchbooks, so as to save only the meaningful images and articles and declutter the rest. It sounded like a great idea -- I'm a magazine hoarder too! And like all great ideas, it got filed away in my brain...and the magazines kept piling up.

But this summer with Sean wanting to cook more, he kept coming to me and asking if we had a good recipe for this or that, and I just knew there was one somewhere on that shelf where all the cooking magazines are...But who wants to thumb through the recipe index at the back of each magazine on an entire shelf? So, I finally decided to tear out the recipes we want to try and organize them into books.

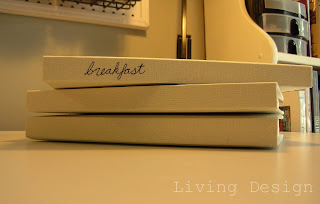
I started with just three books, though I know I'll need at least three more! I got white canvas covered sketchbooks from Michael's (actually the same ones Kate used for her project, though I didn't know it until I went back to her article when writing this post!) One has breakfast recipes, one has desserts and one has slow cooker recipes.

Living Design: Organized Recipe Books

Living Design: Organized Recipe Books

For pages that had recipes I want to keep on both sides, I just hand copied the recipe onto the page. Minimizing the extra paper glued into the book helps keep it flat.

I'm very happy with how these books turned out, and I can't wait to use a coupon to get more sketchbooks -- I'm thinking one for vegetables, one for main dishes...

Do you have any tricks to organizing recipes from magazines? I'd love to hear your ideas!


Wednesday, October 9, 2013

A Month of Small Fixes: Calendar Art

I admit, I hoard craft supplies.

Anything that looks like it could be useful for a project down the road HAS to be kept. Sometimes this leads to drawers full of old calendars...

And sometimes this leads to old calendars becoming art.

And who doesn't love free or cheap art?

Living Design Calendar Art

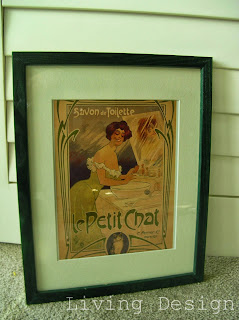
I recently hung this in the bathroom.

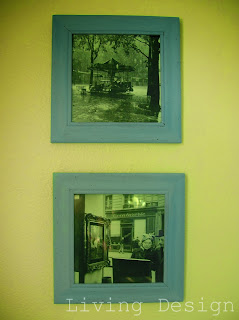
And remember these from my living room? They're also photos from an old calendar!

Living Design Calendar Art

Living Design Calendar Art

Using calendar pictures to decorate is very simple. Just find an image you like, and place the frame over it to figure out your crop (if needed). Trim (if needed) and frame! It's an excellent way to personalize your walls without spending much, and the perfect excuse to keep on hoarding those craft supplies!

****

Linked up to:

Monday, October 7, 2013

A Month of Small Fixes: Kitchen Light

The next mini project in our "Month of Small Fixes" series took very little time, and cost only about $4! I can't believe it took a year to get around to this one...

When we first moved into our condo, the ceiling fan in the kitchen had an exposed CFL bulb and was missing whatever cover it originally had. We put getting a new globe for it on our to-do list, but somehow every time we went to the hardware store we never made it to the right aisle to pick one out. It looked like this for over a year:


Well, in a spree of taking care of the little things around the house, I finally picked up a new globe. It's not completely perfect (anything that fits around a light bulb makes the cords bend around it...makes me wonder what originally was there) but it's certainly an improvement over a bare bulb!


What a difference this simple globe makes!

Thursday, October 3, 2013

A Month of Small Fixes: Office Closet

First up in the "Month of Small Fixes" is a mini-makeover I did to the closet in our office at the end of summer.

Since we don't keep any clothes in the office closet, the part with two levels of hanging bars was not proving very useful. We had basically put the file cabinet in there, then shoved boxes and bags of stuff on top. It was a mess and didn't help us organize anything. Below is a picture of the closet how it was (with much of the junk moved out already, you can see some of it in the vanity area)

Living Design: Office Closet

In order to make the closet work for us, I decided to install a shelf. I had 3' of space to work with, and luckily on my trip to Orchard that day, they had a wire shelf that was 3' long! Score! It's a bracket shelf rather than a standards system, which was incredibly easy for me to install by myself. Here's the shelf installed in the closet:

Living Design: Office Closet

And here is how we have started organizing our stuff on the shelf:

Living Design: Office Closet

The plastic bins on the right hold my model making supplies. The currently mis-matched bins hold other craft supplies (stickers, stamps, etc). The set of tiny drawers currently holds Sean's electronic components, but we're going to share those drawers so that model people and furniture have a safe and organized place to go. I'm hoping to borrow my parents' label maker soon so that we can truly get this shelf working for us!

Living Design: Office Closet Organization

We're also considering adding another shelf halfway between this one and the top hanging bar, so that we're not tempted to just stack things incredibly high. Maybe a project for Thanksgiving break?

Stay tuned for the rest of my "Month of Small Fixes"!

Tuesday, October 1, 2013

A Month of Small Fixes

Happy October! I'm heading into a very busy month at school, with tech rehearsals and a show opening, so I've queued up a number of posts showing small projects around the house that can make a big difference. Here's a quick preview of some of the things I'll be showing you:

Living Design: A Month of Small Fixes

I hope you enjoy the posts over the next few weeks, and please chime in if you have any quick and easy projects you'd like to share!

Tuesday, September 24, 2013

Quick Baby Gifts

I recently picked up knitting again, and since I had a baby shower coming up for a friend I decided to tackle a baby sweater vest as my first project. I picked up this free crafting sheet at Michael's to try out. My original plan was to make the vest using the 6 month directions, but I accidentally misread the needle size and used the millimeter size rather than the US needle size. But, following the 6 month directions using smaller needles ended up making a newborn size sweater, so it worked out!

Since the newborn vest didn't use as much yarn as the original directions called for, I used the rest to make another (using the correct needle size!) for my cousin's kid as a Christmas present. (Yes, it's already time for holiday planning! Chanukah is extra early this year, starting the night before Thanksgiving, so it's never too early to start planning for gifts.)

Here's a picture of the two finished products, one newborn and one roughly 12 month size:

Living Design: Quick Baby Knitted Vest

The directions were very easy to follow, and it makes a cute and snug little baby vest!


***

Linked up to:

Tuesday, September 17, 2013

Experimenting with Slow Cooker Freezer Meals

It's sometimes truly amazing how productive I can be around the house when I'm procrastinating on school work!

This weekend I made my first foray into the world of slow cooker freezer meals. I've been pinning recipes for a while, but hadn't yet gotten the hang of all the pre-preparation. But, with busy tech weeks coming up for my play at school, I decided now was the time to tackle it. It can be hard to keep to a healthy, real food diet when I'm gone from the house for 12+ hours a day for multiple weeks, so planning ahead is absolutely necessary! I'm hoping that with these three meals, each of which uses about 1 lb of chicken, we will be able to eat healthily despite the late nights.


The recipes I chose to try are Apricot Chicken from A Year of Slow Cooking, Thai Peanut Chicken from Practical Stewardship, and Chicken with Kumquat Chutney based on the Barbeque Chicken at Practical Stewardship.

We haven't tried these meals yet, so I'll be back with updates to let you know how we liked each meal!

What are some of your favorite recipes for the slow cooker? Or for busy nights? I'm always interested in new meal ideas!

****

Linked up to:

Thursday, August 29, 2013

We Have Compost! Worm Update

I think it's time for an update on our super cheap DIY worm bin, don't you?

Despite some hiccups as we got the hang of maintaining the correct moisture level in the bins, we have had success! A couple months ago the first bin was getting pretty full, so we decided to rest it (that's when you stop adding new material so you force the worms to finish off everything that is in there and turn it into nice compost). I made a second worm bin (same method as my first) and transferred about two dozen worms in there so that we could keep composting our kitchen scraps while the first bin rested. I continued to turn the compost so that it didn't get too damp or packed down, but otherwise tried to leave the resting bin alone. And this past weekend, it looked done!

To sort out the useable compost and get the worms back into a worm bin to do more composting for us, I dumped the finished bucket into a large empty planter pot. Then, handful by handful, I put good stuff into another pot, things that need more time back into a worm bin, apricot pits that somehow made it in went to another pail (the worms can't eat them so they just take up space) and worms themselves got tossed back into the two worm bins.

Here's a nice fat worm:


And here is some good compost being sorted:


Now we're letting the second bin rest, while we continue to feed worms in the first once again. 

I'm very happy with how this experiment has been working out. I wish we had room for a larger worm bin, since especially on big canning days the worms can't handle all of our scraps. But it's certainly better than nothing, and these little guys divert the majority of our kitchen waste from the garbage, instead turning it into wonderful food for our veggie plants. And on a normal (non-canning) week, we really only need to take the kitchen garbage out if there's packaging from raw meat in there! I think this means that when either our complex gets green waste pickup, or we get a house with large compost capabilities, we will definitely be able to bring kitchen waste close to zero. Yay!

I'd love to hear from anyone who has experience with worm bins -- any great advice or stories? Please share!

***

Linked up to:
Frugal Days, Sustainable Ways at Frugally Sustainable
Waste Not Want Not Wednesday at Poor and Gluten Free

Tuesday, August 27, 2013

Apartment Gallery Wall

My sister Laurel will be starting grad school next week. Since she is planning on staying in the same apartment for the next two years, we finally had the chance to do some fun decorating! (We couldn't do much when she was in the dorms, then she studied abroad, and then was only in her last apartment for 6 months -- not enough time to do much decor.) Last week I drove out to Sacramento to help her put together this gallery wall. I'll walk you through our process here.


Living Design: Apartment Gallery Wall

The layout of the apartment naturally pushes the majority of furniture towards the wall on the left, which the complex painted an avocado green as an accent:

Living Design: Apartment Gallery Wall

The wall opposite stretches into a somewhat awkward entry hallway, and also has the door to the balcony on it (as well as leading to the bedroom, bathroom, and linen closets, which you can't see here). With Laurel's furniture, the flow of the room worked the best with no furniture on it. The best way to take advantage of a completely clear wall? A floor to ceiling gallery!


We started by laying out the art she already had. She also wanted some shelves, since her small bookcase was already full and she hadn't even bought her books for this semester! After a shopping trip to Home Depot for shelves, as well as stops at Cost Plus and Target to get some more variety in frames, we figured out our composition on the floor. After many tries and lots of rearranging, we finally had something we liked.

Living Design: Apartment Gallery Wall

The next step was to hang it all up! We started with the larger middle shelf and the painting directly above it. We then moved outwards, readjusting as needed when we got close to the ceiling, or to the thermostat and light switches which we had decided would act as boundaries for the collage.

Laurel's style when it comes to hanging pictures is very different than mine (or Sean's). Sean is an engineer, and very much needs things to line up; I tend to break lines more often but I still gravitate towards more orderly arrangements. Laurel likes things even more random than I do! With the collection of differently styled and sized frames, and so many different finishes throughout the room (yay for second hand furniture!) it really works. We were able to achieve a nice visual balance without any symmetry, and most importantly Laurel loves it!

Living Design: Apartment Gallery Wall

Next up, Laurel and our mom are going to finish slipcovering her chair (you can see a little bit of it in the bottom of the picture above) and then more fun details for her living room! After looking at Pinterest together we've defined the look she wants for the apartment as "nautical with modern lines" -- basically beach inspired but modern and clean with a good dash of Restoration Hardware inspiration. It's going to be a lot of fun pulling the whole apartment together. Thanks for letting me help you decorate, Laurel!


****

Linked up to:

Tuesday, August 20, 2013

Recap: Summer 2013

It's the end of summer break. Sean is back at school tomorrow, and I start again on Monday. Although summer was a bit anticlimactic since he has a regular job and I had a fairly regular internship, it's still a bit sad to get "back to the grind" and a bit scary to think that soon we'll be dealing with proposing and doing our master's theses! But before real life takes over again I thought I'd take some time to reflect on how much fun we did have this summer despite "grown up" work schedules.

We volunteered with Village Harvest, picking oranges, apricots, apples and more. We made jams, preserves, applesauce; baked bread, turnovers, cake and cookies. As Sean's interest in where food comes from grew, so did his confidence in the kitchen. After years of having a hard time cooking together, we truly enjoyed cooking and baking together this summer!


Our balcony garden was fairly successful, giving us beautiful plants and a decent amount of food.


We spent time in beautiful Monterey...


...and celebrated our first anniversary under the gorgeous redwoods of Felton (in the Santa Cruz mountains).


We went on lots of hikes, and checked off a few state parks on our list. (On our honeymoon we made a goal of visiting each of California's state parks together while married. At our current rate, we'll finish around our 40th anniversary.)


We spent time with friends, hosting dinners and attending dinner parties. We went to a play, the aquarium, and our own local parks. We spent some great time with both families, everything from my sister's graduation in June to relaxing pool time with Sean's sisters.

It was a wonderful summer. Here's to an equally amazing fall!

Friday, August 9, 2013

Packed Lunches for Adults, Round 2

My first post on packing healthy lunches for adults was so popular, I'm back with Round 2! Below are some examples of how I pack healthy lunches for myself, working in an environment with no reliable access to a microwave. Here we go...


turkey wrap, sugar snap peas, crackers, yogurt with honey and fresh berries

 salad, carrot sticks and plain yogurt with honey


 roast beef on half of a homemade hamburger bun, carrot sticks, yogurt with honey and trail mix


 sandwich on homemade sourdough bread, carrot sticks and trail mix


 bean and corn salad, watermelon cubes, and homemade granola bar


 sandwich on homemade bread, homemade granola bar, watermelon cubes and cucumber sticks


 chicken sandwich, bell pepper strips, homemade applesauce and trail mix


****
Linked up to: